Whether you’re just starting your career as a personal trainer or you’re an established professional who is looking to grow your business, one thing is clear in today’s competitive fitness marketplace:
You MUST have a professional website.
Selling personal training services is much different today than it was even 5 or 10 years ago. In the past you could rely on your fitness knowledge or friendly personality to sell potential customers. They meet you, they like you, they buy from you.
This doesn’t work today.
Research has shown that 88% of consumers search online for information, offers, and reviews BEFORE they will ever make a purchase.
- Are potential customers able to easily find you online and learn about the fitness services you offer?
- Does your online presence guarantee that you’ll make a good first impression when prospects “meet” you on the web?
- Is your website (if you even have one) going to convince prospects to take that first step and book a consultation with you?
If you answered “No” to even one of those three questions, please read on. This guide will show you the exact steps required to build an amazing personal trainer website.
Ready to get started? Here we go…
Table of Contents
Click any of the topics below to jump directly to that specific section. Or, you can simply scroll down to learn everything you need to know about building an amazing personal trainer website!
Step #1: Selecting Your Domain
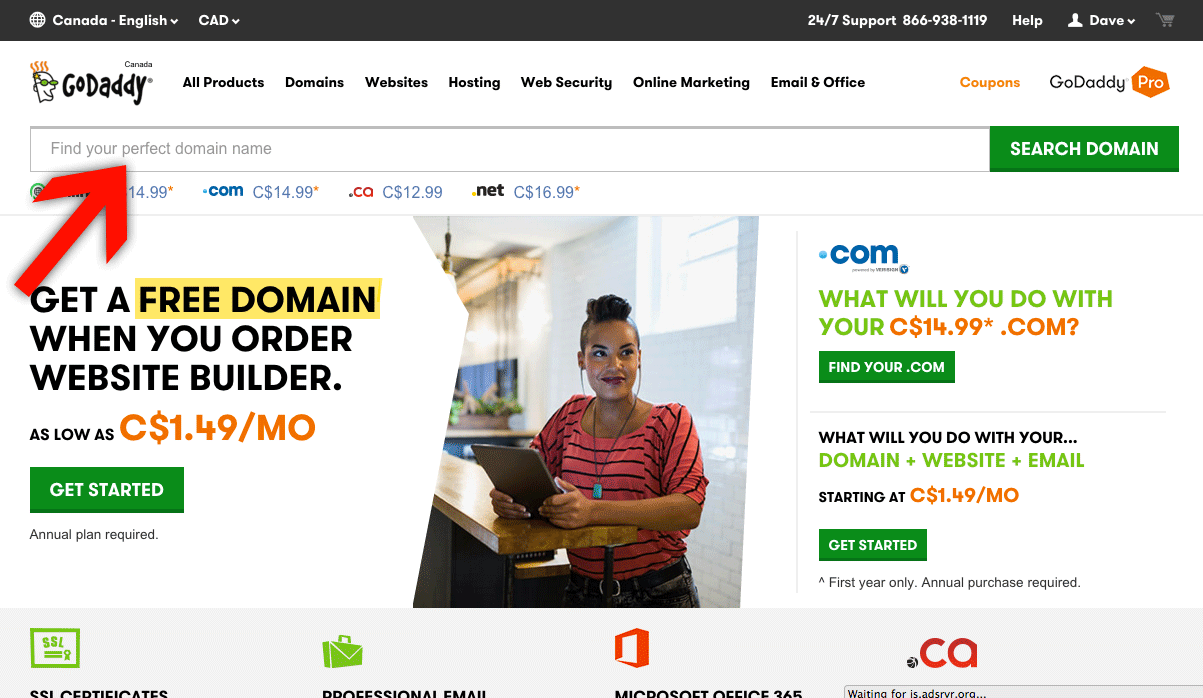
If you already have a business name then this part is pretty straightforward. Head over to Godaddy.com and search for the .com version of your exact business name. For example, if your business is called “Dave Smith Personal Training” (original, right?) then you want to pick up DaveSmithPersonalTraining.com.
Pretty simple.
But, what should you do if your exact domain is already taken?
Get creative, but be strategic.
Here are a few rules to follow when you search for domain name alternatives for your fitness website:
1. Don’t use obscure domain extensions. It’s best practice to stick with .com OR an extension specific for the country you operate from such as .ca for Canada. Stay away from all other extensions as they make your domain confusing to remember.
2. Never use a hyphen. Dave-Smith-Personal-Training.com might look good, but imagine trying to pass it along verbally. What a mouthful!
3. Stay away from numbers. DaveSmithPersonalTraining1.com is complicated and will have clients asking, “Is it the number ‘1’ or do I spell it O-N-E?”
4. Do use appropriate abbreviations. DaveSmithPT.com is a great option. What others could you use that will make sense to clients who don’t work in the fitness industry?
5. Avoid “made up” words and abbreviations. FitnessWorx.com is an example of another domain that is hard to remember and will have you constantly clarifying the spelling.
With those rules in mind, start searching for unclaimed domains on GoDaddy. It’s a good idea to make a list of available options and perform some “consumer research” before you make your final decision.
Don't make people guess how to pronounce your domain name. Keep it simple.
Narrow down your list to your 3 best options and ask for input from at least 10 friends or family members.
They may view the options much differently than you do – that’s a good thing! Which do they like best and why?
Great work! But, don’t buy that domain just yet. Find out why as you explore Step #2…
Step #2: Choose Your Web Host
Now that you own an awesome domain for your personal trainer website, you need a place to store the content that will be shown on your site – this is called “web hosting.”
There are many great web hosts you can use, but let’s stick with GoDaddy for simplicity’s sake. All hosting companies will offer a variety of plans you can choose from, but in most cases it’s fine to choose the cheapest option.
Here are a few things to look for when choosing your hosting plan:
1. Get your domain for free. Many web hosts will offer a free domain when you purchase hosting. This is why you didn’t purchase your domain in Step #1 – You’ll get it for FREE in this step!
2. Look for included email addresses. If you’re taking your business seriously you won’t use davesmith@gmail.com for your business email address – this just screams “unprofessional.” Your hosting plan should offer the option to create dave@davesmithpt.com free of charge.
3. Opt for unlimited bandwidth. Bandwidth determines the amount of traffic your site can handle. While you might not have many visitors in the beginning, unlimited bandwidth ensures that your site can handle increased traffic as your site grows in popularity.
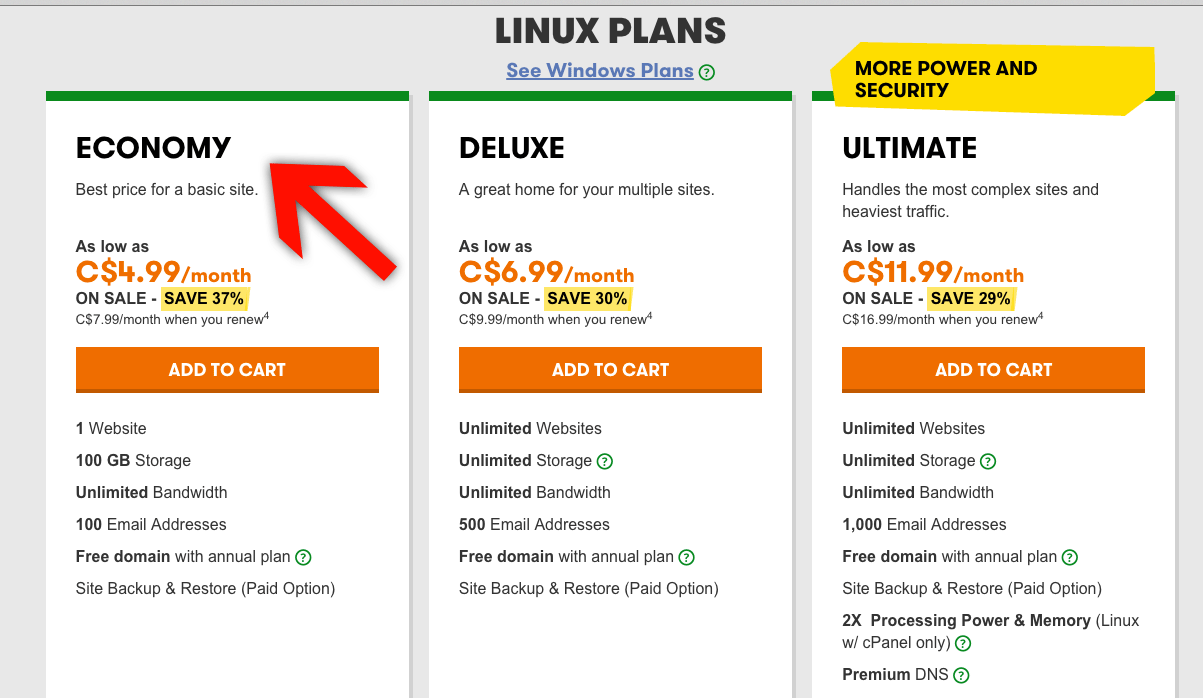
Many hosts will offer all sorts of upgrades and add-ons at an additional cost. It’s very unlikely that you need any of these – Save your money! And remember that you can easily upgrade your hosting package at any time if you do find your needs change.
Go through the checkout process to purchase your domain and hosting plan. Again, avoid the upsells that are surely going to be thrown at you…just buy what you came for!
Step #3: Choose and Install a CMS
You have a domain and your space to store your personal training website. The next step is to choose a program that allows you to actually design your new fitness site. This is known as a Content Management System (CMS).
Again, there are lots of available options but WordPress is the industry standard. Now, just to make things confusing, there are two versions of WordPress:
1. WordPress.com: This is a blogging platform that includes hosting, but offers very restricted functionality. You don’t want this.
2. WordPress.org: This is free-to-use software that you install on your web host to gain complete control over your site as it grows. You want this!

It has been estimated that nearly 60% of websites built today choose to use WordPress as a CMS. This is mostly due to its unparalleled functionality – You can make your website do just about anything when you choose WordPress as your CMS.
Now you just need to install it in your hosting account. Don’t worry – Your web host will make this very easy…
In fact, most hosting companies realize that the majority of their customers are using WordPress and have made the installation process nearly single-click. You can follow the steps found here (GoDaddy) or simple call your web host and a support representative will install WordPress for you.
Step #4: Find Your Perfect Website Theme
Upon installing WordPress your personal trainer website will automatically be given the default WordPress theme. A theme is simply the stylistic design of your site. This includes the colour scheme, layout, fonts, and all other artistic elements that will determine how your fitness website looks.

The default theme is very nice.
Don’t use it.
By the nature of it being the default theme, many sites around the web use it. You want your site to stand out from the crowd. You want to have something unique, something with a little more personality.
It’s time to find a theme that suits your business…
Fortunately, there are literally thousands of themes you can choose from, some free and some that you will have to purchase (i.e. a premium theme).
Before choosing your theme it’s a good idea to learn what you like. Check out our featured websites section at the end of this article to see some of the best fitness websites you’ll find anywhere online.
Jot down a few that you like and then begin to search for a theme that will allow you to produce something similar. You can perform this search in the theme directory or you can do it from the “backend” of your site.
Note: The “backend” (a.k.a. “admin panel”) of your website can be accessed by typing in the following into your browser search bar: http://www.davesmithpt.com/wp-admin (replace “davesmithpt.com” with your actual domain name).
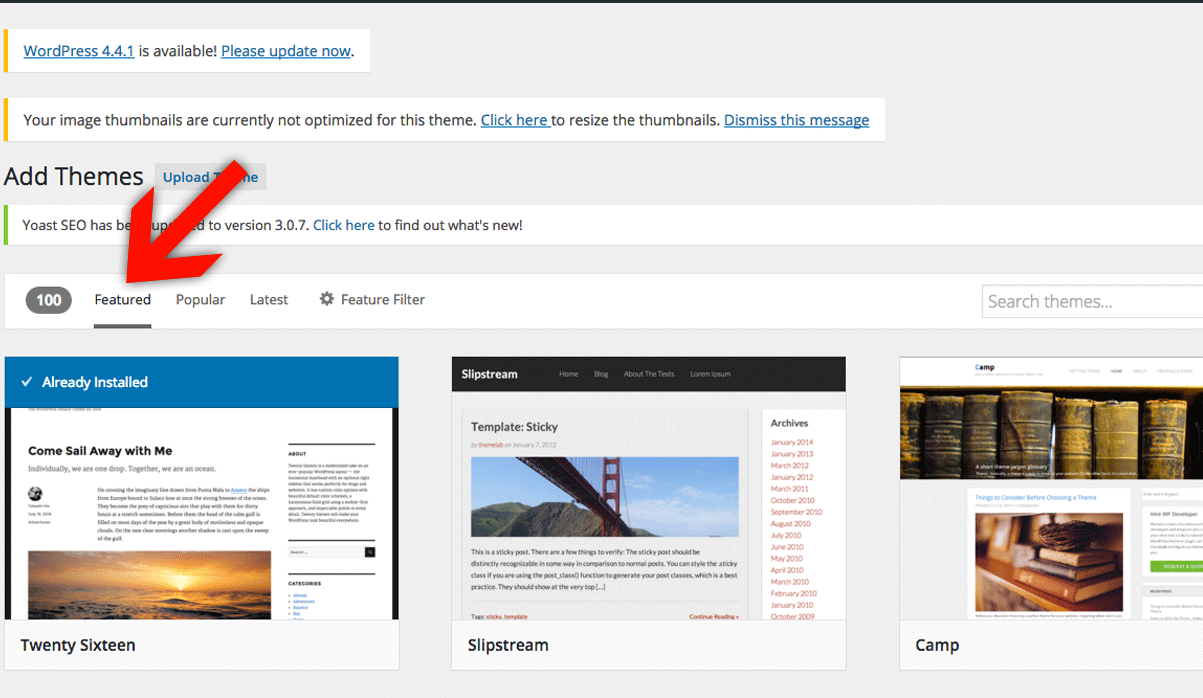
The backend is where you, the website administrator, can control all features, content, and functions of your site. Below is an image from the theme selectin page found in the backend of WordPress:
Here are step-by-step instructions to help you install the theme you choose.
“Why would I pay for a premium theme when I can get one for free?”
Great question (glad you asked!)
While there are many beautiful free themes you can choose from, premium themes do offer at least two significant benefits:
1. You can customize more extensively. Many premium themes allow you to customize just about anything you’d like whereas free themes are generally more static.
2. You will get access to theme support. Most premium theme designers offer support for their customers. This is SO helpful, especially if you’re looking to make a lot of customizations to your site. If you choose to use a free theme then you’re pretty much on your own.
Make sure your website is unique, just as the services you offer are unique!
Free and premium themes install using the same process and instantly your fitness website will reflect the change. Enter your domain into a browser search bar and you will see the new design (although there won’t be any content on your site…yet!)
Step #5: Create Your Company Logo
While you can have your logo designed as soon as you choose your company name, it’s sometimes helpful to wait until after you’ve studied other personal trainer websites and have chosen your theme. The research you have done at this point will help you determine what you like in terms of fitness logos.
The Golden Rule for Logo Creation: “Do it right the first time!”
Yes, you are likely excited to get your website online as soon as possible, but do not rush the logo design process. Your logo is the visual representation of your brand – It will be used on your website, business cards, stationary, and email signature, just to name a few places – You don’t want to have to change it in the future.
Here are the steps you should follow to ensure your logo is top-quality:
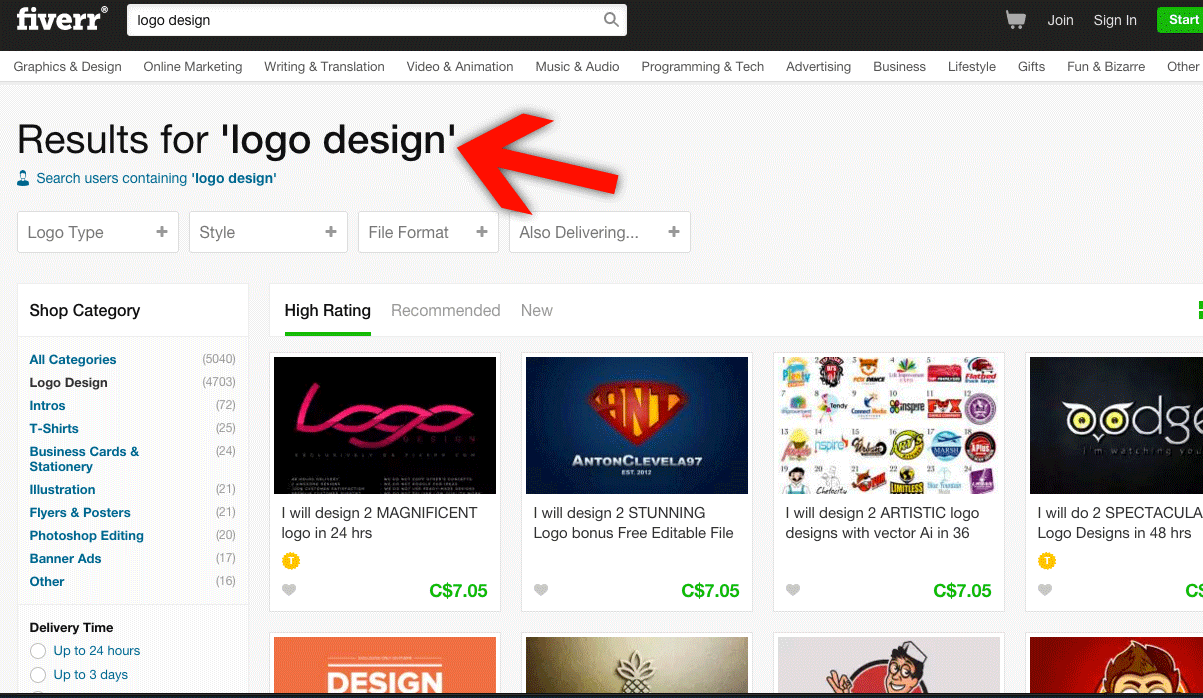
1. Hire a professional to create the design. This might sound expensive but it doesn’t have to be. Use fiverr.com to find professional designers who will create your logo for as little as five bucks (no, that’s not a typo!)
2. Give very clear direction. Your designer can only do work that’s as good as the direction you provide. Provide examples of logos you love. Explain who your target customers are. And give specific colours that you want the designer to incorporate (Hint: Don’t say, “I want it to be blue”…provide a colour hex code using this tool)
3. Recruit lots of feedback. Just as when you chose your domain name, it’s important to get other opinions on your potential logo designs. Your opinion obviously matters, but you may glean very helpful ideas by getting extra eyeballs on your logo before it’s finalized.
PRO TIP: LOGO ORIENTATION
Pro Tip: In general, “landscape” orientation logos are more web-friendly than “portrait” orientations. Landscape designs use up less vertical “real estate” on the screen, which is becoming increasingly important as people browse the web more often on mobile devices.
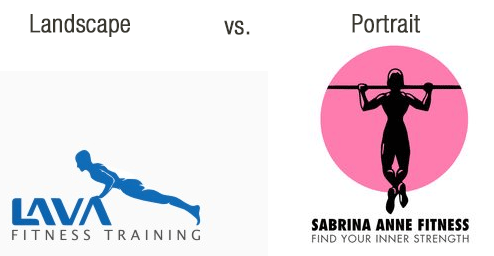
You don’t want your logo to occupy too much space or create large areas of blank screen around it. As you can see above, the landscape logo is much more compact and will therefore not take up this valuable vertical screen space.
Ask your designer to provide the finished work in two file formats:
1. Photoshop (.psd) or Illustrator (.ai): These are design files and they will allow you, or another designer you work with in the future, to modify your logo if it’s ever needed.
2. Image saved as .png: Images saved as .png are perfect because they offer transparent backgrounds (i.e. you don’t want a big white box surrounding your logo), and they are often smaller in file size, which will help your site load faster.
Now that you have your logo created, follow your theme instructions to upload the .png file so that it displays on your website.
Nice work!
Step #6: Use Professional Photos
Imagine you had a car up for sale and a prospective buyer was coming to take a look. Do you think you would take the time to wash the car and clean the interior?
Of course you would!
You would make sure your car was spotless because you know that the way a product looks communicates a lot about the quality of that product. A clean car is a high-quality car.
You are just like a car.
You can save a few bucks by snapping pictures of yourself using your smartphone, but these amateur photos will communicate a lot to your website visitors. Amateur photos tell your website visitors that you are an amateur.
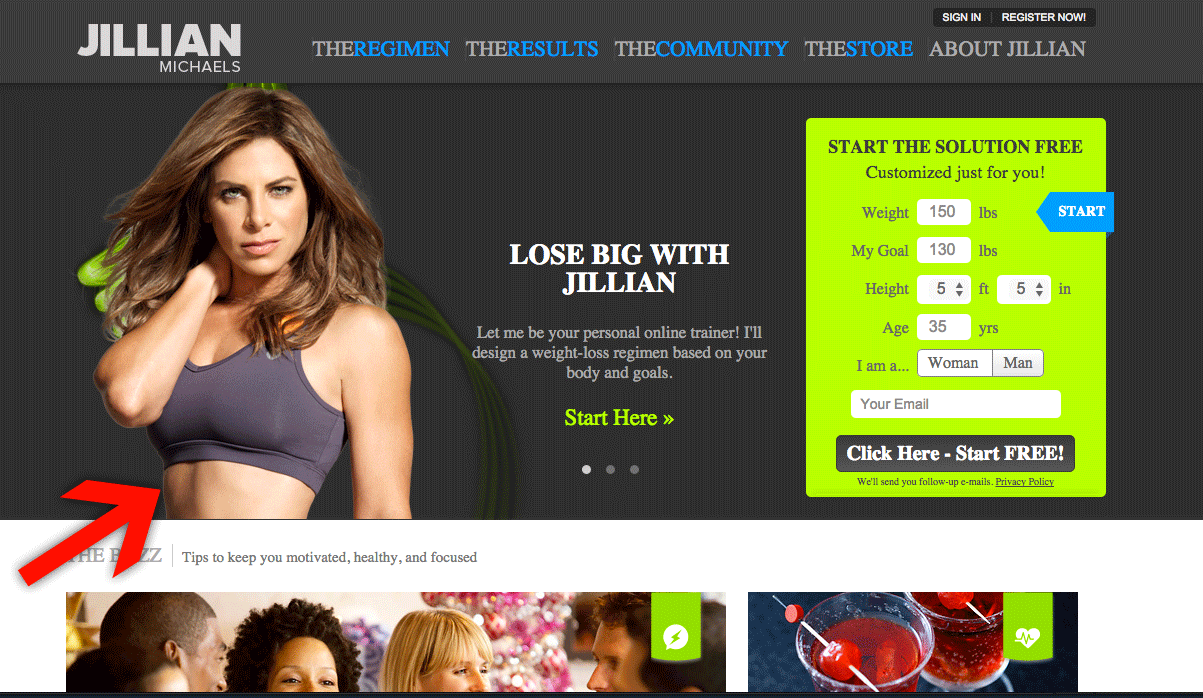
Take a look at websites owned by celebrity personal trainers (think Jillian Michaels). How do they look in their photos? They look amazing!
You need to LOOK professional so that visitors believe you ARE professional.
Professional photos for your website don’t have to cost a fortune. Search your local classifieds or try Kijiji or Craigslist to find a photographer who charges reasonable rates and has an impressive portfolio.
While on the topic of photos, DO NOT use any stock photography on your website.
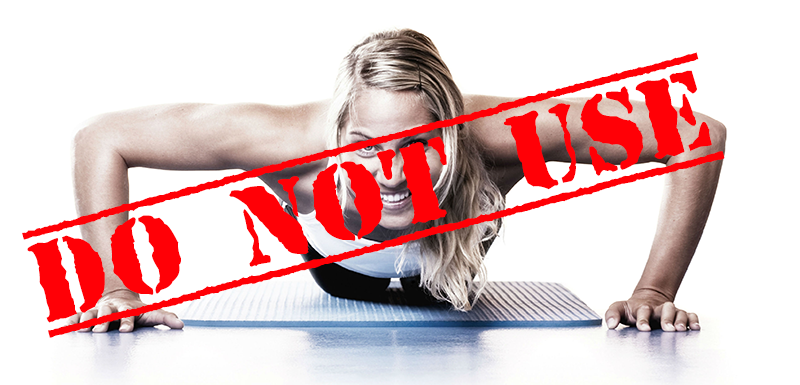
Stock photos, while they do look high-quality, are generic – They don’t show anything authentic about you or the services you provide.
Instead, your personal training website should show images of you providing personal training to real clients.
These action shots show you in your element and show how happy your clients are. They love working with you...and so will new clients who are about to sign up for your services!
Step #7: Include These Must-Have Website Pages
You’re finally ready to add content to your website! (a.k.a. the fun part!)
While your website content will likely change and grow over time, there are a few must-have pages that you should create first. Here are the steps you can follow to create new pages in WordPress and here’s a description of the pages you should prioritize:
1. Home: Most of your web visitors will start here, so be sure to include your very best personal photo (smile!), a tagline that briefly explains what your business is all about, and a call-to-action (i.e. what do you want visitors to do next?)
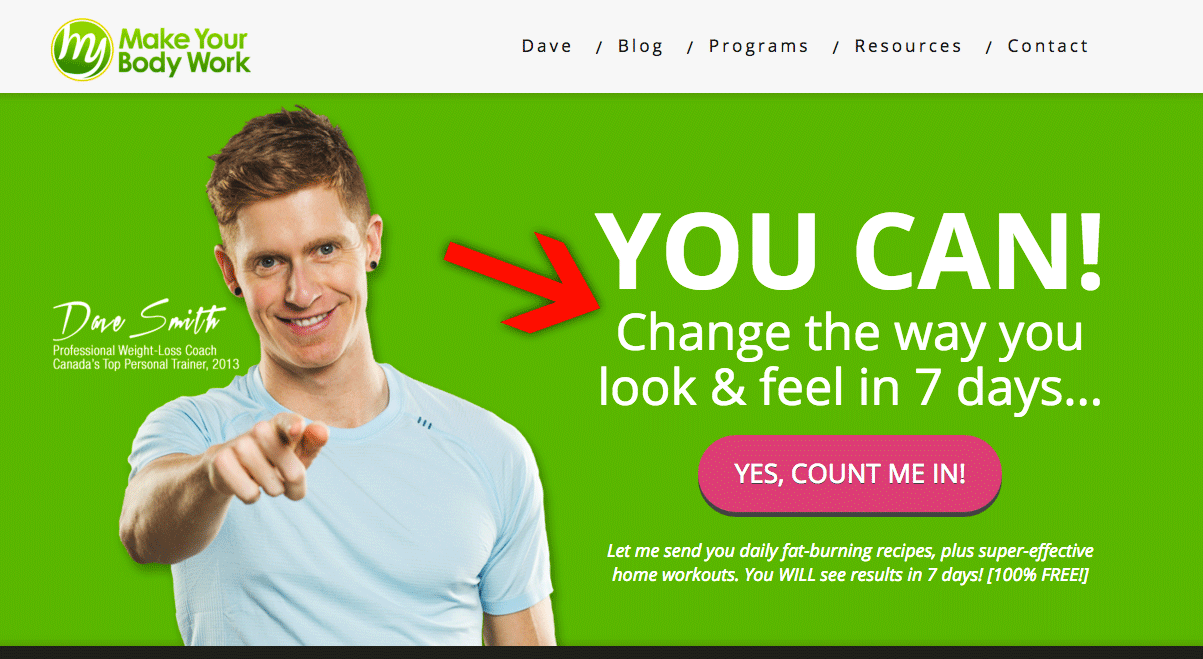
2. About: Many personal trainers make the mistake of telling their life story on the about page. Nobody cares. Use this page to explain why you are perfectly suited to serve your target clients.
Choose your niche and then explain why YOU are THE expert in that niche.
For example, if you work primarily with new moms, explain why you are so passionate about this clientele and what experience or education you have that allows you to serve them better than any other trainer could.
Ideally your "About" page would include a video of you speaking about your passion for personal training (and of course you’d mention all the benefits your clients receive). Video is the best way for prospective clients to see your personality and begin to like and trust you.
3. Services: Be specific about what services you offer, who each service is for, how a client will benefit, and how much the service costs.
Next you MUST include client testimonials for each of your services. These can be written quotes accompanied by a picture of your client or, and even more powerful, you can include video testimonials.
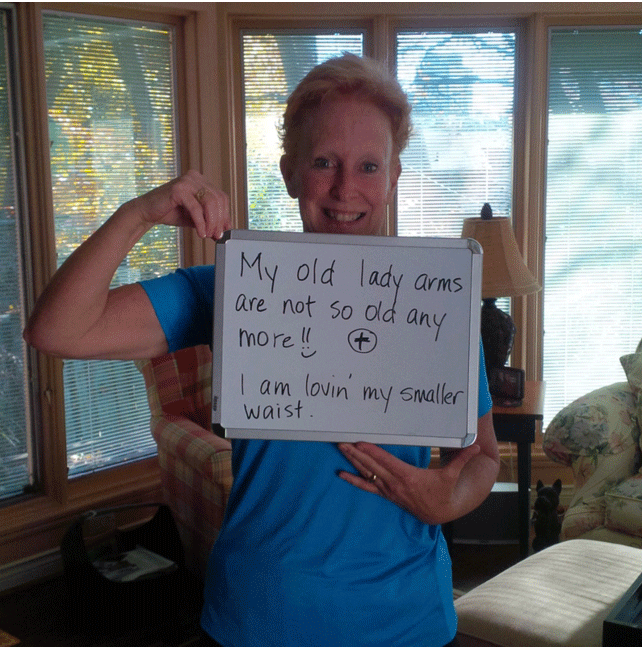
Source: http://www.nielsenfitness.com/testimonials.html
Let your raving customers help you create new customers!
Finally, your services page should include a very clear call-to-action that will lead your website visitor one step closer to becoming a customer.
- Do you want them to contact you via email or phone?
- Can they book a consultation online?
- Or, can they make a purchase directly from your website?
If you’re not sure how to accomplish these actions, take a look at the recommended tools in our bonus section below.
4. Contact Me: Even though e-commerce is growing by leaps and bounds each year, some website visitors will still want to buy the old-fashioned way: Face-to-face. This is especially true of high-ticket items such as multi-session personal training packages that can cost hundreds or thousands of dollars.
Make it VERY easy for these prospects to contact you, ideally via email and via phone. Then, be sure to follow up promptly with any inquiries you receive. A quick response communicates how highly you value customer service – This always bodes well in your favour.
Again, check out our recommended tools to learn how to create an easy-to-use contact page.
Step #8: Plug In These Crucial Website Features
When you installed your WordPress website you got just the basics, which is more than enough to have your site up and running in no time.
However, the real beauty of WordPress is its ability to be modified with countless “plugins” that allow for greater functionality.
Much like WordPress themes, plugins come in both a free and premium variety. Free plugins typically allow your site to perform simple tasks (e.g. receive emails submitted via a contact form), whereas premium plugins can transform your fitness website into a revenue-generating machine.
Again, you don’t have to install any additional plugins to make your site work, but the following are highly recommended if you are serious about building an online presence and generating new leads for your fitness business.
This section will speak in generalities about the types of plugins you might want to consider. See our recommended tools bonus section for specific plugins that can accomplish these tasks for you.
1. Email Capture. Perhaps the best way to foster relationships with prospective clients is through email marketing. Once you have a person’s email address you can send them offers and inform them of new services.
But first you need to capture their email address.
Oftentimes this will be accomplished by offering a FREE newsletter, e-book, or some other item of value that can only be accessed when a visitor enters his or her email address.
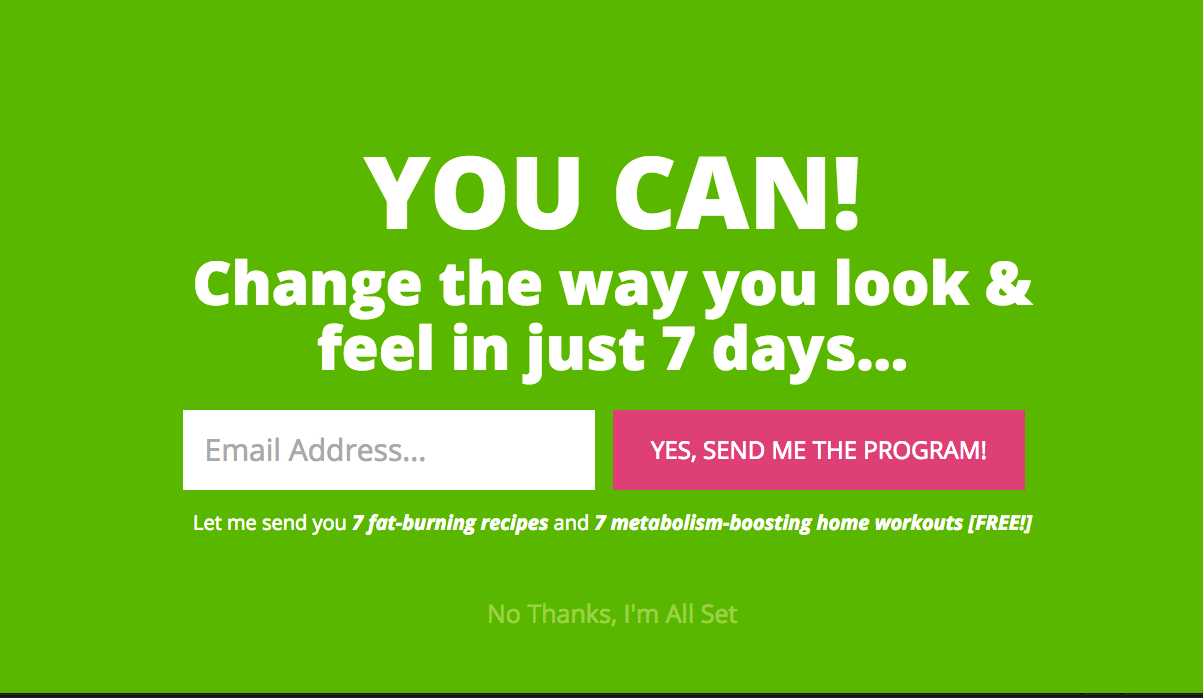
“List building” should be a personal trainer’s best friend and should be something started immediately. The sooner you begin building your email list, the quicker it will grow, and the more sales it will deliver.
2. Social Sharing. People spend more time on social network sites like Facebook than they do anywhere else on the web. Make it dead easy for them to share your website socially by providing “share” buttons on every single page, perhaps even in multiple places on each page.
When a website visitor shares your site, this acts as a powerful “real time” testimonial that can quickly reach hundreds of eyeballs that would otherwise have never been introduced to your fitness business.
3. Payment Processing. Your goal is to eliminate all barriers a client might face when he or she is ready to make a purchase. If you are only accepting cash and cheque payments for your services, then you are missing the mark.
- Do all of your clients carry cash?
- And if so, do they have enough to pay for high-ticket personal training packages?
- Do they really need to remember their cheque book in order to buy from you?
Provide all payment options by including payment processing built into your site. Again, check out the recommended tools section to see how easily this can be accomplished.
4. Traffic Analysis. This might seem like overkill for a brand new personal training website, but being able to analyze your traffic will become crucial as your site popularity grows.
- Where are your visitors coming from?
- Which of your pages do they visit most often?
- How long do they stay on your site?
These are just a few of the important questions you can answer if you use a plug-in that enables traffic analysis. (yes, see the recommended tools section below to learn more).
Even if you don’t analyze your traffic to begin with, it’s important to install this feature so that your site tracks your visitors and their behavior. In the future you will be able to look back on this very valuable data.
5. Search Engine Optimization (SEO): Many websites derive half of their traffic or more from Google and other search engines. This traffic is free and it’s highly targeted.
Just think, when someone types “personal trainer for new moms Toronto” into Google, you can take a pretty educated guess as to what they’re looking for.
They want to buy services that might be just like the ones you provide!
A SEO plugin will help tell Google what your site is about and what services you offer. This can drastically increase the likelihood that a prospect will find YOU when they use Google to search for their next personal trainer.
PRO TIP: KEEP IT SIMPLE
Pro Tip: When using WordPress as your CMS, the plugin options are nearly endless. It can be tempting to install every bell and whistle you come across.
Resist that urge!
Plugins add to the complexity of your site and can cause it to load more slowly. This results in a frustrating experience for your site visitors (just remember how you felt when you visited a site that took ages to load!)
Start by adding these recommended plugins types and then slowly add plugins only when necessary. Also be sure to deactivate and uninstall plugins that you are no longer using.
Bonus: Expert Tips
Here's what some recognized digital marketing experts think should be the #1 thing to consider when building your personal training website:
The key to good local website design is making sure you give your visitors the information they want most straightaway.
From our recent research into local business websites (link below) we know that the majority of local consumers have 4 simple questions they want answering when they come to a website :
1. Does this person/company provide what I'm looking for?
So your website needs to quickly & clearly explain what you offer.
2. Can I afford to use the person/company?
Don't make the mistake of hiding your costs. Be upfront so users can quickly rule themselves in/out of using you.
3. Where is this person/company located?
Users want to know if you're genuinely local to them, or serve their area. Don't hide your address details & services areas away - put them on every page on your website so it's quick & clear to find.
4. How do I contact this person/company?
Make it easy for customers to contact you by placing your number, email, Facebook, Twitter, details etc... on every page on your site. It's important to understand that different people like to contact you in different ways. Some prefer phone, some prefer email, some want to come and visit you... So don't just offer a phone number and nothing else. Make it easy for different people to contact you in the way they prefer.
The final point I will stress is the importance of 'Trust'. For someone to take the step from viewing your website to contacting you, they need to know they can trust you. And the best ways to quickly establish trust are these -
- Named Customer testimonials - put a relevant testimonial/quote from a customer on (almost) every page on your site. Each testimonial should be accompanied by customer's name & ideally their photo. This shows that they're willing to publicly vouch for you.
- Accreditations - show off the industry bodies, training & certifications that you have. Use their official logos so they standout & also link to your profiles on these sites if you can do.
- Photos of you - show people what you look like. If they're going to work with you they want to know you're not an axe murderer!
Link to research: https://www.brightlocal.com/2016/02/19/34-of-consumers-think-a-smart-website-gives-a-local-business-more-credibility/
 Myles Anderson
www.brightlocal.com
When creating a website the most important thing to keep in mind at all times is : what are your business goals? By this I mean, what is it you want the visitor to do when they are on your website (which ultimately generates more leads, more sales, retention etc...).
 Ashley Faulkes
www.madlemmings.com
The most important thing to remember when building a website is its primary purpose or main 'Call to Action'. You want your website to act as a portal which attracts people, gives them what they want and in return entices them to do what you want them to. Anything that doesn't fit into that process is a waste of precious space.
 Wade McMaster
www.wellbuildyourblog.com
Focus your content more on what your target audience wants and less on what you sell. Show how your readers can fulfil their dreams and reach their goals — and on how you can help them do that — rather than on how they can buy your stuff. The more you talk about them and their needs, the more they will trust your website and you.
 Lorne Pike
www.lornepike.com
The most important thing to keep in mind when building your website is who your audience is. Who is this website for? What are they looking for when they visit? What can you do to help them? If you keep your audience and their needs in mind every step of the way, your website will be significantly more successful.
 Cameron Chapman
www.cameronchapman.com
When building a website, I ensure I know what the client’s product or services are about. Every website that we currently build needs to be responsive.
Another point I like to put a lot of effort into is to ensure when possible that the three-click strategy is followed: an online user should get what they require in no more than three clicks with a fair amount of call to actions in strategic places.
 Johnny Da Silva
 www.johnnydasilva.com
Bonus: Recommended Tools
Below is a list of WordPress plugins and other online services that you may want to integrate into your website for improved functionality and a better user experience.
The best free and premium tools you should use on your personal training website!
Free WordPress Plugins
Contact Form 7: Easily add a contact form to your website so that visitors can easily reach you via email.
Easy Digital Downloads: Sell (or give away) digital products such as e-books, videos, audio recordings, and even online courses. Use this in conjunction with Paypal (see below).
Sumo Me: Add social sharing buttons across your website.
Wordfence: Dramatically increase the security of your website to prevent hackers from accessing the backend and/or other important data.
Yoast SEO: Quickly add “meta information” to the pages on your website. This is the best way to tell Google what you do and who might be interested in your services.
Tracking Code Manager: Enable traffic analysis across your site. Use this in conjunction with Google Analytics (see below).
Premium WordPress Plugins / Themes
FormMaker: Create registration forms, client surveys, take online payments, and more.
Thrive Leads: Add email capture across your site. This plugin makes it easy to create “opt in” boxes and to test the effectiveness of various designs against one another. This is a great way to quickly build your email list. Below 2 extensive reviews about Thrive Leads:
- Thrive Leads Plugin Review: Easy Email List Building With One Plugin
- Thrive Leads Ultimate Review
Thrive Themes: A drag-and-drop editor that takes all the guesswork out of designing a custom WordPress theme. This is a perfect solution for personal trainers who want to be able to modify every aspect of their site design. Click here to read a detailed review of Thrive Themes.
X Theme: Another highly customizable theme that makes it easy to generate a site design to meet your exact needs and tastes.
Free Online Services
Canva: Create professional-looking images using done-for-you shapes, fonts, and templates.
Google Analytics: A free service provided by Google that will track an immense amount of valuable data about your website visitors and their behavior on your site.
GT Metrix: See how fast (or slow) your website loads. Also get a free report showing areas where you can improve your site performance so that visitors have a better experience.
Mailchimp: Create and send beautiful email campaigns and newsletters. This is a great tool to use for email marketing and email list building.
Paypal: Securely process online credit and debit card transactions.
Picmonkey: Use this online photo editor to easily edit your photos, add effects, and improve their overall professionalism.
Bonus: Sellar Fitness Website Examples
Now that you've got the exact steps to follow for building your own personal trainer website AND the tools that will make the job super-simple, it's time to get inspired!
We've compiled a list of the best personal trainer websites you'll find online. Here are a few to get you started, then click here to see even more inspiring examples:
Jamel Ramiro
Beautiful images and simple navigation for an excellent user experience make Jamel's site stand out from the crowd.

Wild HIIT
Wild HIIT does an excellent job of using call-to-actions to entice visitors to learn more, connect, join, or make a purchase.

Beyond Fit Mom
Kate Horney creates a strong affinity with her website visitors. It's easy to know, like, and trust Kate when you see so many pictures of her and her beautiful family!

Josh Andac
Josh Andac uses a tasteful pop-up to offer a compelling lead magnet to site visitors. Building his email list will allow Josh to promote new services to his audience in the future.

Jade McClure
Jade makes excellent use of testimonials right on the homepage of thejadeway.com. This boosts his credibility and increases the chance of new visitors wanting to learn more about his fitness services.

You want your website to be built by a professional? Have a look at My Personal Trainer Website, a personal trainer website design and fitness marketing service.